Outdoor Oasis: Outdoor Showers
August 06, 2016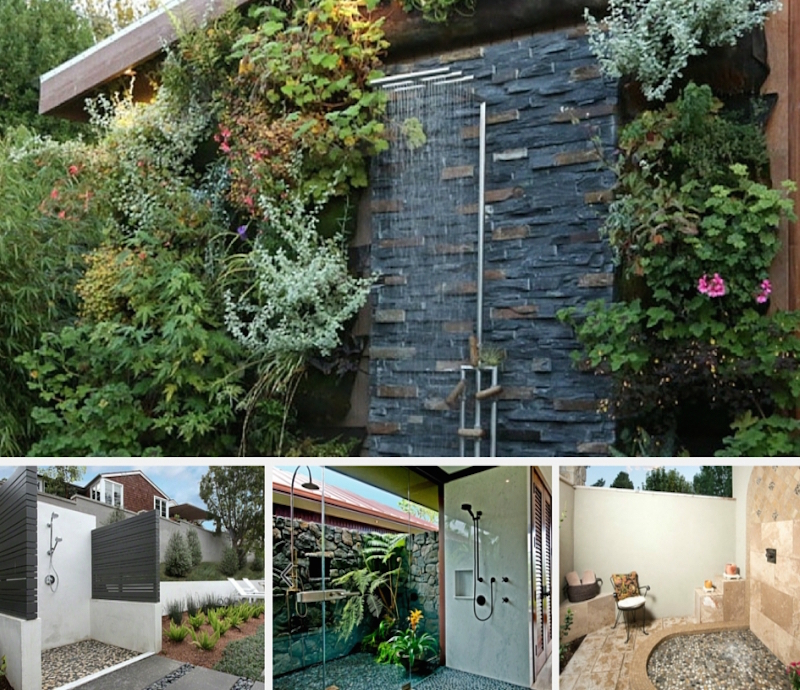
You don’t have to live near the ocean or a lake to appreciate the functionality of an outdoor shower. Pool owners, avid nature lovers, pet owners, home gardeners and mechanics who like to get their hands dirty without bringing the mess inside, will all love the functionality of this additional fixture just as much. Clean-up is extremely convenient when you can simply rinse off the sand, grease or mud outside your home.
Remember, just because you’re adding open-air plumbing doesn’t mean you have to let purpose trump aesthetics. With the right materials—such as beautiful stacked stone—you can create a stunning outdoor shower that perfectly suits the architectural elements of your home or beautifully blends in with the surrounding landscape.
Using MSI's prearranged mosaics and ledger panels, building an outdoor oasis with a professional, designer-look is easy. And with these 3 tips and tricks, you’ll be inspired to turn your outdoor shower idea from a utilitarian box to a luxurious escape.
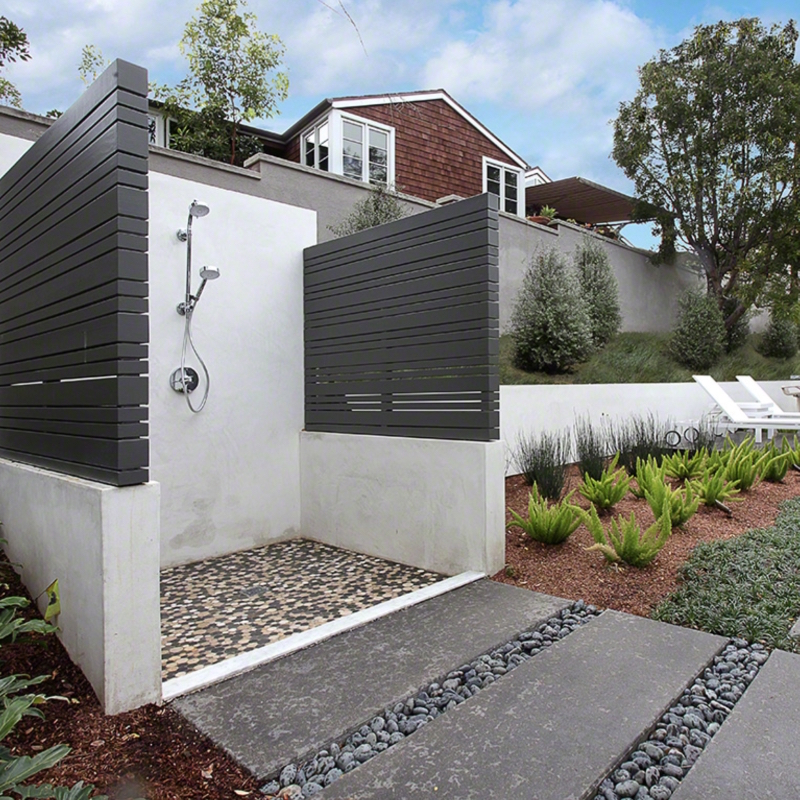
 Featured: Mix River Pebbles
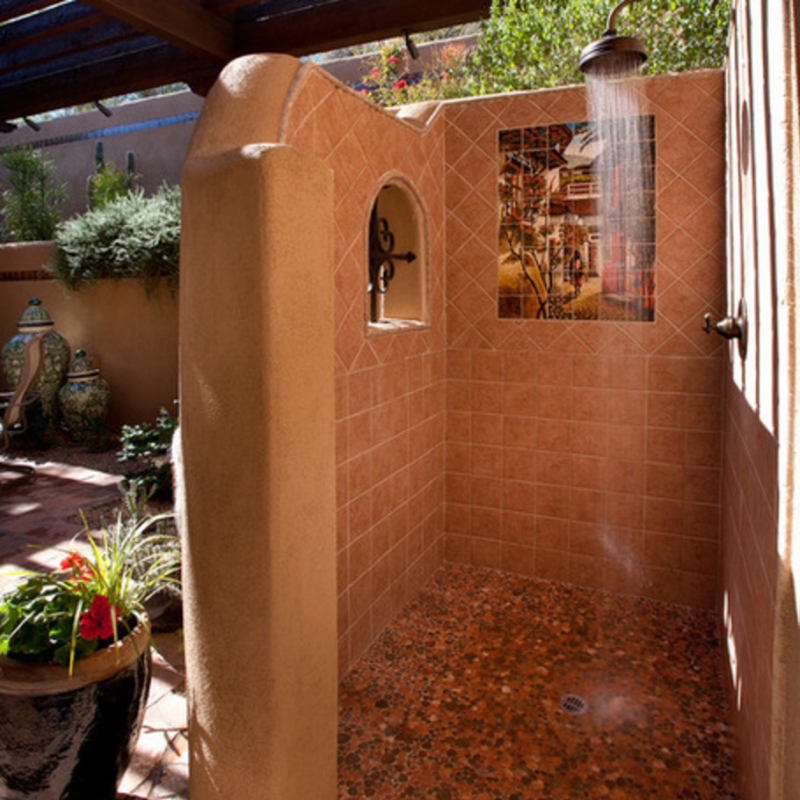
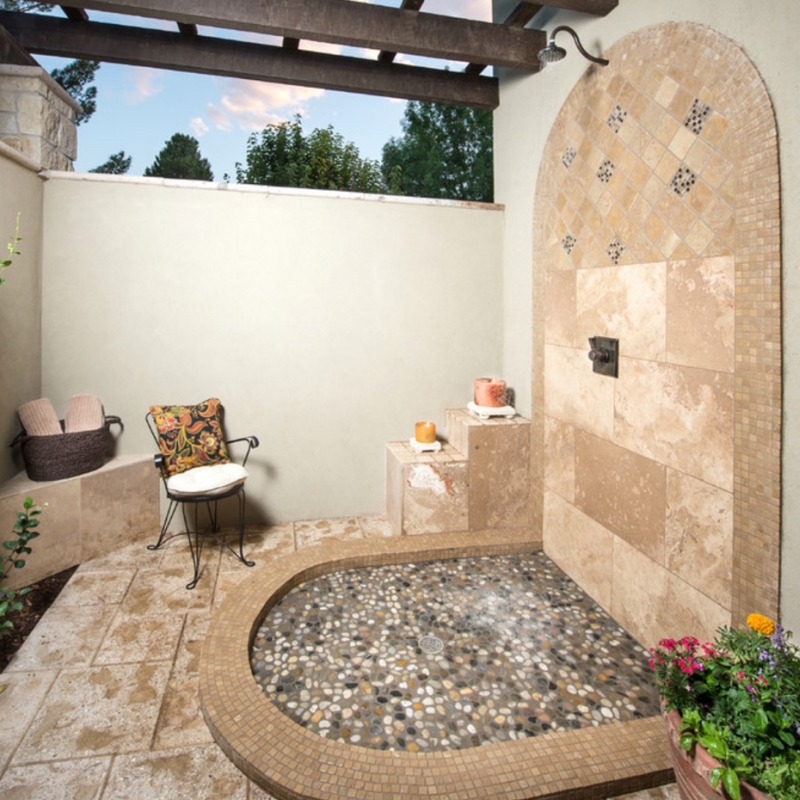
1. Pick Your Perfect Style
Selecting your style and exterior space may determine which materials you use, and how much you will need. Are you going for a modern open shower with a stone veneer wall on the side of your house? Is your plan to create a partially enclosed shower with rustic, old-world charm? Or do you have enough space to design a private oasis that organically flows into an interior bathroom retreat?
Whichever design element appeals to you, you’ll be able to bring your vision to life with products and inspiration from MSI.
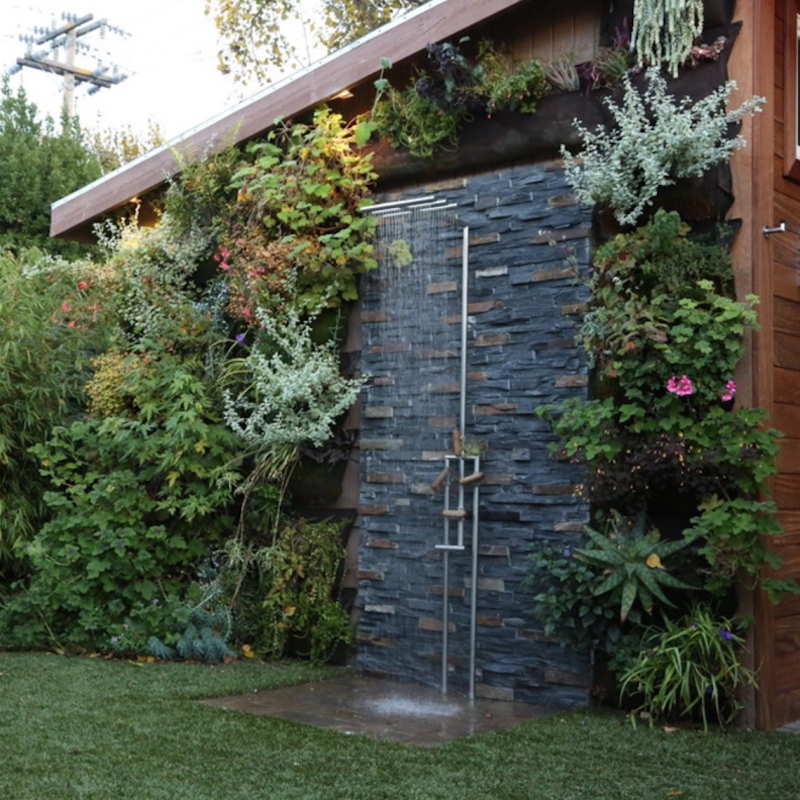 Featured: Charcoal Rust Stacked Stone
2. Use Durable Materials
Once you have your location and plumbing chosen, it’s time to talk materials. From slabs of granite to glass mosaics, you can use a variety of tiles to create your outdoor shower. Tiles are easy to clean and maintain, and the grout lines may even keep you from slipping. Small materials like mosaics adhere easily to unusually shaped showers. However, not all tiles are meant for the great outdoors. If you live in a cold climate, be sure to select frost-resistant materials that absorb less than 3 percent moisture to avoid freezing and cracking when the temperature drops.
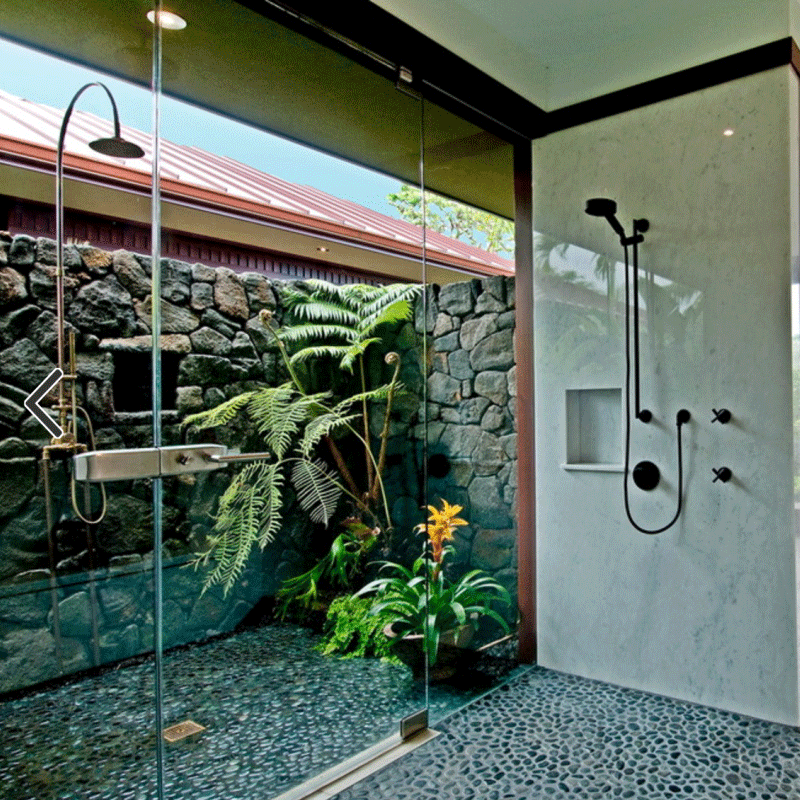
 Featured: Black Polished Pebbles
3. Tackle an Easy Installation
Natural stone ledger panels in a slate tile add drama to your outdoor shower walls. Their jointed design and flat back make them easy to install, and they can be placed on any walls designed for masonry. Since you should only build your stone in increments of three feet at a time to give the thinset time to dry, you can accomplish your new project in just a few days.
 Featured: Black and White Pebbles
To give your feet a luxurious spa experience, add pebble mosaics to your outdoor shower floor. Start with a suitable subfloor before you lay out and set your interlocking tiles in place. Apply thinset, and then fill in the gaps with loose pebbles pulled from another mosaic sheet. Let this dry for 24 hours before grouting, and finally, add a coat of sealer.
 Featured: Tuscany Scabas Stacked Stone
Perhaps you have dreamed of including an outdoor shower in your home build or update, but hadn’t thought beyond the practicality of the idea. With these tips, you can move beyond utility and create an open-air retreat that is also design-conscious and beautiful.